Anyhoodle...

I whipped up a little painting smock for Lara yesterday because every time she asks to paint in the house I immediately become stressed about the messy clothing sure to occur. I know those little paints say "washable," but trust me - they really aren't.
Here is how I put this simple smock together.
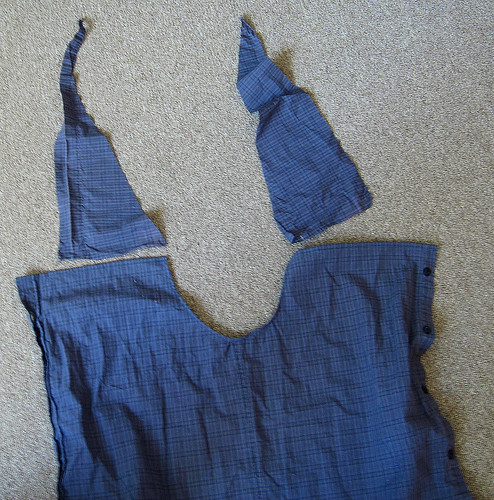
1. Start with a large men's button-down shirt, made of a woven rather than knit material. It helps if the shirt is medium rather than light weight fabric because otherwise the paint will just seep through. Cut out the front of the shirt, following collar, shoulder, sleeve, and side seams.
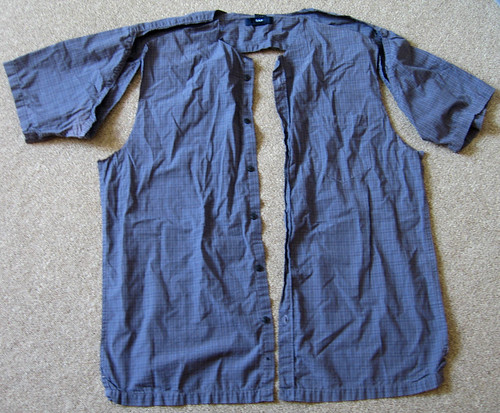
2. Put the two shirt front pieces together, with the original left side on the right and right side on the left, so that the arm hole curves line up into a U-shaped neckline.
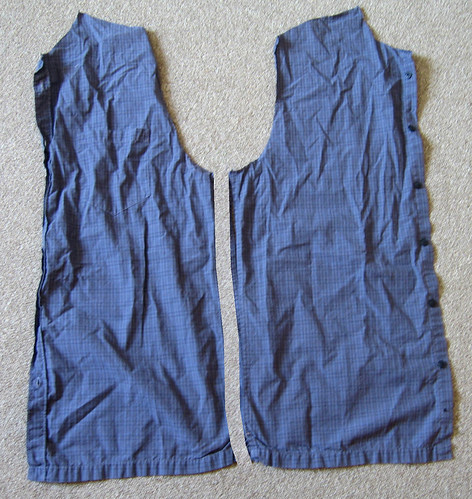
3. Sew the pieces together, and then cut off the excess part of the new shoulders (I just measured against an existing shirt, and then allowed another inch for wiggle room). Hem the newly formed shoulder and neckline, and then be happy that the original shirt hems are still there and so you don't need to keep hemming all the way around.
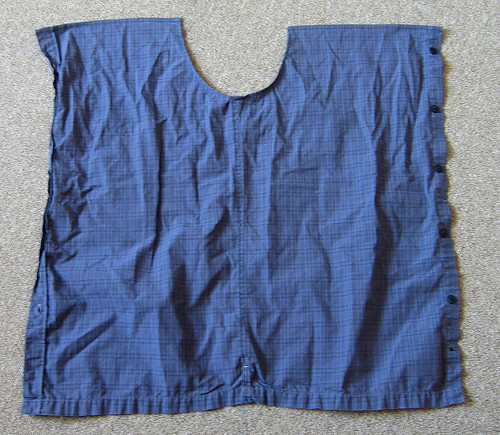
4. Cut two rectangles out of the rest of the shirt (I used the back placket for this and it worked really well to keep the pieces the same size without having to measure), each approximately 1.5-2' long by 5-6" wide. Fold each rectangle in half lengthwise and sew up along the long side and one of the short sides. Turn inside out, creating two long tubes each with one sealed end. Position each unsealed end on the wrong side (this is very important, otherwise your smock will turn into a robe) of the smock and attach about 5 inches away from edges. In the picture, the red lines are the sewing lines - sew a secure box seam, and do not sew the whole length of the tube to the smock.
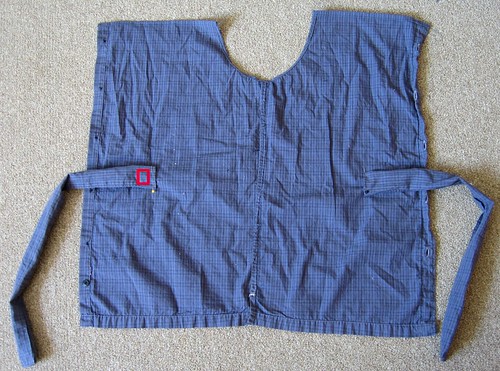
5. Cut two triangles about a foot long, and 3/4 as wide as the shoulder. Hem these and attach to the shoulder, flush with the neck opening. You're done!
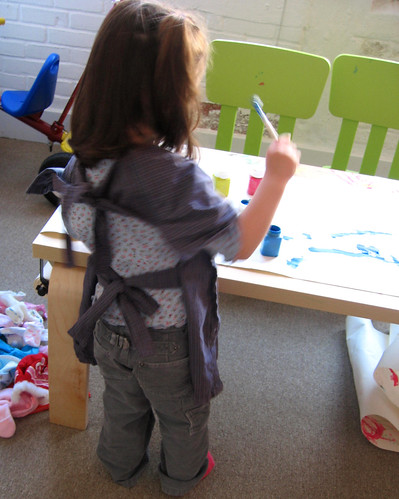
6. From the back, the smock will tie in two different places - around the neck, and around the waist.
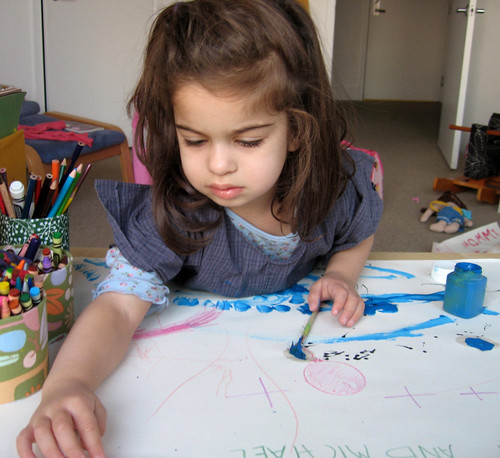
7. From the front, even if your daughter reaches across her wet paints to reach something from the other side of the table, you'll be able to smile without simultaneously gritting your teeth. Ta-da! Problem solved.

11 comments:
So much artistic talent in one family! Great improvisation.
Lovely!!!
Cute model and a practical project!
I love this, thanks for the inspiration! (and what a lovely model you have) :)
Also - great instructions and the best future Artiste!
Love those! I hate to get a really cute art smock since it'll get all messy anyhow, but this is so simple I could make a whole pile of cute ones!
Thanks for sharing :)
Best,
Amanda @ www.kiddio.org & www.housemade.org
I love your creative idea. I hope you don't mind me linking to your blog.
I promise I'm not a spammer! :>) I need to make one of these for my daughter so I can get over my fear of letting her do messy stuff... great tutorial! I linked on my weekly roundup - thanks for sharing!
This tutorial for kids not for old peoples.
I really liked your article. Keep up the good work.
Nice effort, very informative, this will help me to complete my task.
Post a Comment