
Today is all preparation. Here are the favors that our tiny guests will be receiving - three bibs in this delightful goldfish fabric from Free Spirit (they are backed with some dark blue jersey) for the 5 months and under set:

and some crayon melties for the 18 months and over crowd:
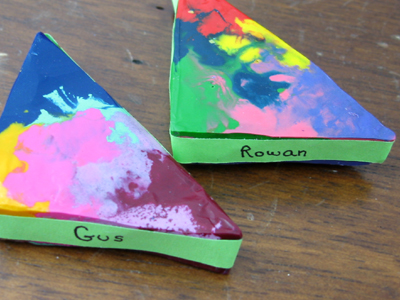
What are crayon melties, you ask? Why they are broken bits of crayons melted together to form new, giant super-crayons of doom! Here's how.
Preheat your oven to 300 degrees. Start with a cardboard shape and some aluminum foil. (The shape should be all convex for this method to work. Initially I wanted to to a star, and that was a bust.)
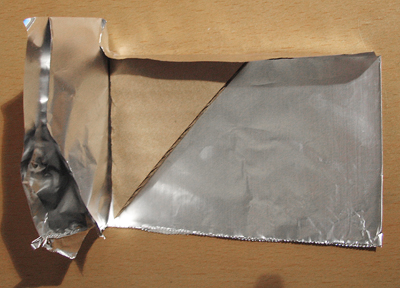
Fold the foil around the shape, making sharp creases around the shape's edges and at all other creases. If your shape has angles, fold each foil triangle that forms at the seam to one side (this way the liquid wax of the crayons won't just leak out.
Remove the cardboard. Peel the paper off the crayons and break them into short pieces (I aimed for four pieces per crayon). The more even your crayon pieces the better, since they will form discreet color blocks within the finished super-crayon. Start putting the crayon pieces into the foil shape upright, filling in tightly.
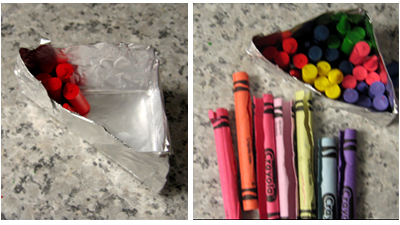
Place on top of a another pieces of foil and put in the oven for ten minutes or so (keep an eye on it and take it out when fully melted. Take the melted crayons very carefully, making sure to keep them very level - if the colors run together too much, they turn into a muddy brown/gray and destroy the effect.
3 comments:
Ever the creative one! Loved the bibs also.... and now looking forward to the pre-birthday party report and pictures :)
I just ran across this...followed your link over from craftster.org (from the cardboard kitchen - I'm magpie0816 BTW) and I LOVE this idea. It is perfect for my son and xmas gifts.
I am really enjoying your blog and insights - especially on art. I literally LOL when reading your post about abstract art as I have had that discussion many a time with my husband (I agree with you).
Thanks for the inspirations. Maggi
Wow, there is a lot of effective info in this post!
Post a Comment