
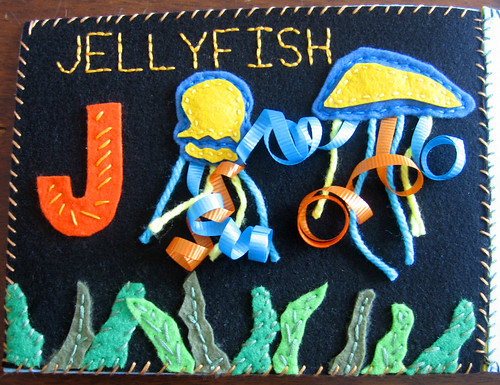
J for Jellyfish, with curled ribbon and yarn tendrils:
A for Arrow, with wire and foam arrows and elastic bowstring:

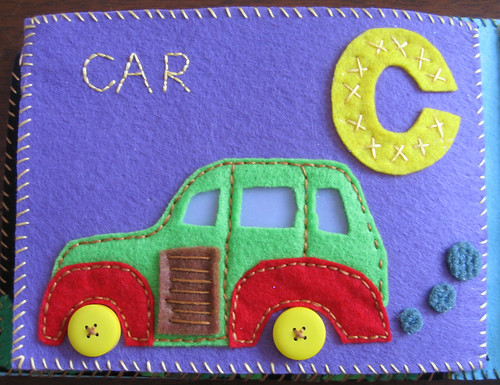
C for Car, with clouded plastic windows and button wheels:
O for Octopus:

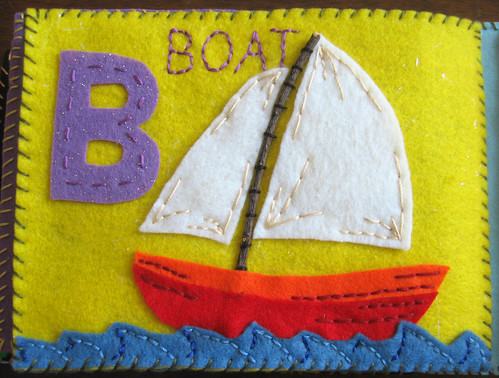
B for Boat, with tree branch mast:
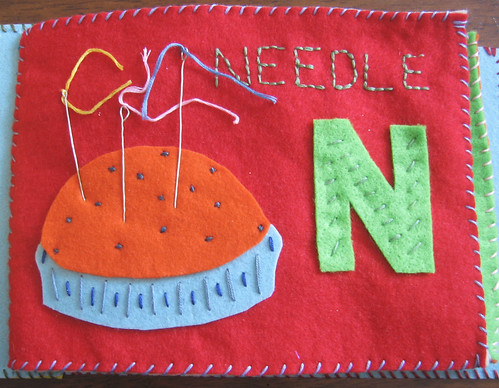
N for Needle, with wire needles and embroidery floss threads:
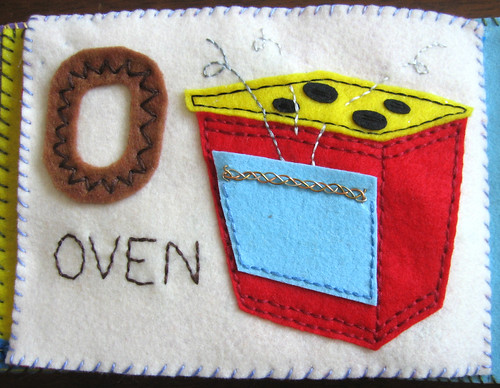
O for Oven, with braided wire handle:
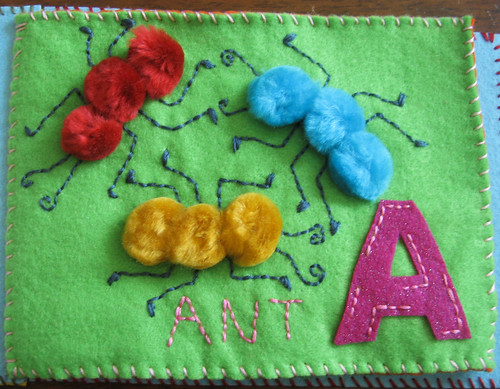
A for Ant, with fuzzball body segments:
H for House, with foam and button flowers:

Whew! Now to wrap it in the paper he will undoubtedly enjoy playing with more for a little while!

20 comments:
Adorable!!!
Wow - the book came out amazing! I am sure Jakey will love playing with the book a little later!!! Way to go, SuperMom!
That's beautiful work. What a lot of great design and patience!
this is simply magical.
I love those things! So beautiful!
what a treasure! thanks for the inspiration!
Wow. I've got a feeling that's going to be a beautiful heirloom someday.
(I found you via the CRAFTzine blog)
This is a wonderful little treasure and gift! Great job!
I had forgotten about your Clothes the Clothes book, and am excited to see it again! I MUST do something like it for me son who needs help with buttons and snaps.
Thanks for the inspiration!
This is so amazing! My niece's birthday is coming up and I really want to make her one. May I ask how you attach the pages to the binding? Thank you so much!!
Hello from Portugal,
What an amazing little book. I think I will still all of it for may new nice.
;)
cristina
Thanks, everyone!
Sweetlime, the pages are attached to one piece of felt with a running stitch that goes through the loops of the blanket stitches along the side. Then, another piece of felt goes over the binding to cover up all the loose threads and to make it look like the cover with the blanket stitches along the sides. Hope that makes sense!
This is absolutely beautiful!
Such a beautiful creation, to be treasured, I'm sure. I think this is the most amazing thing you've made! Anna, I'm a p-net mom who follows your blog - hope to meet you some time at Reunions.
Hi Lisa - thanks so much! I'll actually be at reunions this year, for the first time in a little while. We're psyched to bring the kids to the P-rade and then catch up with the PNet crowd afterwards. Maybe I'll see you there?
Actually, we will miss it this year, but go most every year, living in Lawrenceville. Maybe we can entice you to come to one of our Little Tiger playdates in Princeton (Princeton Area Alumni Assoc - PA3). My Benji is almost 3. Or we can host a playdate at the Philly zoo sometime.
It is really wonderful!!! I would like to do one for my little, who is almost 2...But I do not think I can find enough time for all that..Well, maybe I will finish it by december!
This is beyond awesome! You almost convinced me to have another boy and name him Jacob or Noah just so I can make this book.
Hi.. ur felt book is an excellent idea and a gift to cherish... Can you please tell me how you attached each sheet to form the book?
AWESOME! I so want to make one for my little guy's 1st birthday coming up in March! Would you possibly consider doing a little more detailed tut on attaching the pages to the binding? I read your comment explaining it, and am still a bit confused.
Post a Comment